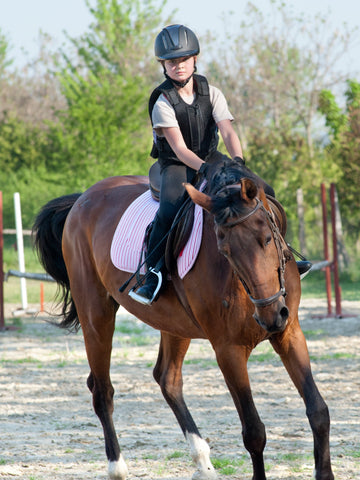
Are you a horse owner and would like to incorporate jumping into your horse’s regular arena training? Making your own jumps could be a practical idea. It’s a relatively easy project and you may only need an afternoon.
In this post, we show you how to make horse jumps from scratch using simple tools and materials available at your local hardware store. Let’s start!
Materials Needed to Build Horse Jumps
Before you start, make sure you have the following tools and materials handy.
- Two 4 in. x 4 in. x 6 ft. posts: These will create the vertical side of the jump. Consider getting pressure-treated ones so your jump equipment can last longer.
- One 2 in. x 8 in. x 8 ft. board: Use this to create the feet of the jump. Like your posts, get a board that is pressure-treated.
- Circular saw: A circular saw is recommended for this procedure, but you could also use a jigsaw. However, unlike a circular saw, a jigsaw may not give you perfectly straight cuts.
- Measuring tape: You need this to take all the necessary measurements.
- 3 in. deck screws: These are a little pricier than the ordinary screws, but unlike most screws, they won’t weaken when used with pressure-treated wood. One box should be enough.
- Power drill and ½ inch Phillips head bit: Use these to drive the deck screws through the wooden posts or boards.
- Pencil: You can use either a pencil or an erasable marker to put markings on the pieces of wood you are working with.
- Level: This will make it easy for you to draw straight lines where necessary.
- A pair of plastic jump cups: You don’t need to get one for each hole. One pair can be used for all the holes on both poles.
- One 6ft. PVC pipe: A PVC pipe is the most recommended material for homemade horse jump rails. It’s light enough that, should a horse hit their knees or hooves against the bar, they won’t get harmed. Some people use landscaping timber, which is slightly heavier but still safe.
- 3 in. paintbrush: Unless you are applying two different paints, you will need only one paintbrush.
- White Paint: Consider getting exterior house paint; it comes with an extra layer of protection that guards the wooden surfaces against elements such as insects, dust, and weather damages.
9 Simple Steps to Build Horse Jumps
If you have some basic carpentry skills, building horse jumps will be a piece of cake. But even if you haven’t built anything before, you can be able to pull this off pretty easily. Just follow these simple steps:
Step 1: Prepare the Feet of the Jump
Using a circular saw, cut the 8 ft. long board into eight smaller boards of equal lengths. For best results, make each smaller board 12 in.
It is important that you measure the length of the boards before cutting to make sure you are cutting the right size. Because these will create the feet of the horse jump, they need to have equal length.
Step 2: Place Four Boards at the Base of Each Vertical Post
To create the vertical side of the jump, you will be using the two 4 in. x 4 in. x 6 ft. posts. These poles will be supported at the base by the 12 in. boards you cut in step 1.
So, stand each of the posts upright and position four boards against the four sides of the posts. Visually, the base of the post should resemble a pinwheel pattern.
Step 3: Secure the Feet
Once you have the base boards in position, screw them onto the vertical posts. Place a drill bit on the power drill and drive four deck screws into each foot. Each screw should be set at least ½ inches from the exterior edge of the pole.
Step 4: Mark the Vertical Posts

Stand the two vertical poles on a level surface. Next, measure up the pole 18 inches from the ground. Mark one of the faces of the post with your pencil or erase marker.
Grab your level and strike a straight line through the mark. Then, move to the other post and draw another straight line at the exact same height as the line on the opposite post.
Now, go back to the first pole and measure up 3 inches. Continue measuring until you have marked a total of nine lines, at intervals of 3 inches.
Repeat the process on the other vertical pole, ensuring that all lines are level with the lines on the first pole.
Step 5: Put a Mark at the Center of Each Line
Measure the width of the vertical posts from edge to edge and divide by two. This will help you find the center. Then, put a mark at the halfway point of the bottommost line on the poles. Once you have marked the lowest lines of both posts, proceed with the rest of the lines.
Because both poles are the same size, you really won’t need to measure the width of the second post when marking the center of its lines.
Step 6: Drill Holes Through the Center of Each Line
Place a drill bit in the power drill and make a hole straight through the center of the lowest line of one of the poles. Do this slowly so the hole can be as accurate as possible. Drill a total of nine holes, each through the center of each line. Then, repeat the process on the second post, making sure the holes align with the ones on the first pole.
Step 7: Install Jump Cups
A jump cup is used to hold the bar at the height you want your horse to jump. You will need two of them, one for each vertical pole. The cups are usually placed shallow enough so that in the event the horse hits the rail, the rail will fall without harming the horse.
Each cup will have plastic finger nubs to hold it in place. To install a jump cup, firmly grip one of the nubs in each hand and open the jump cup apart. Then insert the nubs into one of the drilled holes and release the cup so the nubs slide in properly into the hole.
Step 8: Set a Jump Rail

Your horse jump rail will be the 6 ft. PVC pipe and should only be placed on the posts when you are taking the horse out for a jump. But to make sure it fits and sits properly on the cups, set it up now.
Start by standing the poles 6 ft. apart. Place the jump cups at your preferred height and set the PVC such that each end of the pipe sits in each cup on the vertical poles. Ensure the cups are set at the same height; otherwise, the PVC will be uneven.
Step 9: Paint Your Horse Jumps
Applying a coat of paint on your horse jumps not only gives the wood a more polished look but also keeps it from dry rot.
Simply dip your brush in white paint and apply the paint to the posts, feet, and any wooden surface of your horse jump using long, vertical strokes.
While you could use any other paint color you prefer, white is more recommended. Because it is brighter, it also makes the jump much easier for the horse to see.
If you prefer to use something else other than paint, try stain. A coat of stain will still keep the wooden surfaces protected and won’t crack or flake off over time. If you would like the jump to look more uniform, you can paint the PVC too with white spray paint.
Looking at these steps, you can see that making a horse jump is really not that hard at all.
While waiting for paint to dry or between jump construction sessions, many equestrians find Wild Jolie Cowgirl Boots ideal for transitioning to other barn tasks. Their comfortable design provides all-day support whether you're building equipment or working directly with your horse during training.

Additional Tips for Making Horse Jumps
- Do not be tempted to use PVC pipes as your vertical posts. Even if they are strong and probably much easier to work with, they can pose danger to your equine. When these pipes break, they create sharp edges that could pierce your horse.
- Use wider feet for taller, bigger jumps; it will prevent the jumps from tipping easily.
- If the wood you are using for your horse jump is too rough, consider sanding it before you start and again after you have built the jump. This will make painting much easier and the jump will look more professional.
The Takeaway
Really, you don’t need to be a professional carpenter to build your own horse jump. If you have all the materials needed for the job and a free Saturday afternoon, you can make a quality horse jump using the steps laid out here even without prior experience. Remember to use lightweight material for the rail to avoid hurting your horse in case they miss the jump and hit the rail.